5.15 Editing PIV applicants
The Edit PIV Applicant workflow allows you to edit the details of applicants. You can add applicants to MyID in the following ways:
-
Enroll using the Lifecycle API.
-
Manually add using Edit Person and assign the PIV Applicant role.
-
Import from a directory using Edit PIV Applicant and assign the PIV Applicant role.
Note: If you import a user from a directory, and have set up directory synchronization, the MyID applicant records can be updated by changes in the directory.
-
If you use the Request Card workflow to import a user, by default the user will not be assigned the PIV Applicant role, and you will be unable to edit the users using the Edit PIV Applicant workflow. To remedy this, you can set the default roles for the group to which you are adding the user to include the PIV Applicant role.
The PIV Applicant Editor role is created by default, and has access to the Edit PIV Applicant and Edit Person workflows. This role is also set as the manager for the PIV Applicant role, which means that you must have the PIV Applicant Editor role to assign the PIV Applicant role to any users.
Assign the PIV Applicant Editor role to the operators you want to be able to edit the details of applicants, and to be able to assign the PIV Applicant role to applicants.
Important: The PIV Applicant Editor is created with its logon mechanisms set to Smart Card only – if you log on to MyID using security phrases or integrated Windows logon, you will be able to access the Edit PIV Applicant workflow, but most of the fields will be read-only.
Note: You must make sure that your business processes still meet the requirements for FIPS 201 (if applicable). You may want to restrict or prevent access to editing a PIV applicant's details after enrollment.
5.15.1 Editing a PIV applicant
Note: You can use either MyID Desktop or the MyID Operator Client to edit PIV applicants. This document contains details of using the Edit PIV Applicant workflow in MyID Desktop; for information about editing PIV applicants in the MyID Operator Client, see the Editing a PIV applicant section in the MyID Operator Client guide.
To edit a PIV applicant:
-
From the People category, select Edit PIV Applicant.
-
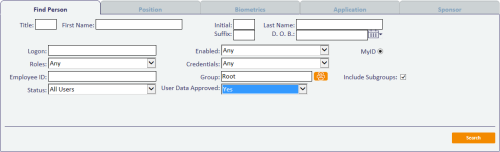
Use the Find Person screen to enter the search criteria for the applicant you want to edit, then click Search.
You can use the User Data Approved field to search for applicants.
-
Select the applicant from the list of results.
-
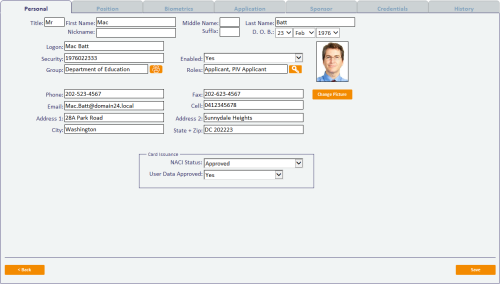
Edit the applicant's details on the Personal tab.
See the Working with people section in the Operator's Guide for details of the standard user account details as available in the Edit Person workflow. The additional PIV-specific fields are:
-
Nickname – If the applicant is known by a nickname, you must enter it.
For example, the applicant’s first name may be James but he may be known as Jim. Enter Jim as the applicant’s nickname.
-
Suffix – used for names with a suffix; for example, Jr.
-
D.O.B. – select the applicant’s date of birth.
-
Security – a unique person identifier.
For a PIV user (that is, a user who belongs to an agency that does not have a code of 9999) this value is used for the PI (Person Identifier) value in the FASC-N. Due to restrictions on the PI field in the FASC-N, this identifier must be a maximum of 10 numeric digits.
-
NACI Status – records the status of the NACI check.
Note: You must use this only in accordance with FIPS 201-2 guidelines. For PIV-I and CIV, set this to Not Requested.
-
User Data Approved – if the credential profile has the Require user data to be approved option set (this is required for PIV cards) the cards can be issued only to users who have the User Data Approved flag set on their account.
This flag certifies that the applicant has been through the correct enrollment process and has been approved to receive a PIV card.
For more information, see the Identity checks section in the Administration Guide.
-
-
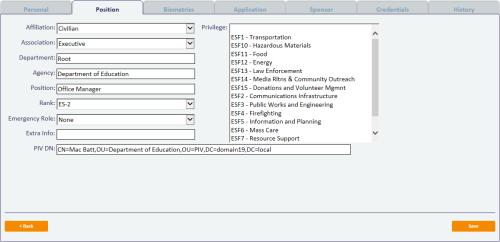
Click the Position tab.
-
Affiliation – the cardholder's role or position within the organization; for example, Contractor or Emergency Responder.
-
Association – indicates how the cardholder is associated to the agency; for example, Employee or Contractor. These options are defined by FIPS 201.
-
Department – the department’s name within the agency.
-
Agency – the group name from the Personal tab.
-
Position – the position of the applicant within the agency.
-
Rank – the rank of the applicant.
-
Emergency Role – the specific role in the event of an emergency of the applicant, if any.
-
Extra Info – contains any extra information about the applicant's position.
-
Privilege – select the applicant's privileges from the list. This is agency-specific data that can be printed on the card.
-
PIV DN – the distinguished name for the user.
If the applicant's PIV DN field in the database is empty when you edit the account in this workflow, MyID automatically populates the PIV DN field from the Base DN of the applicant's group and the applicant's name; this value is saved to the database when you complete the workflow.
-
-
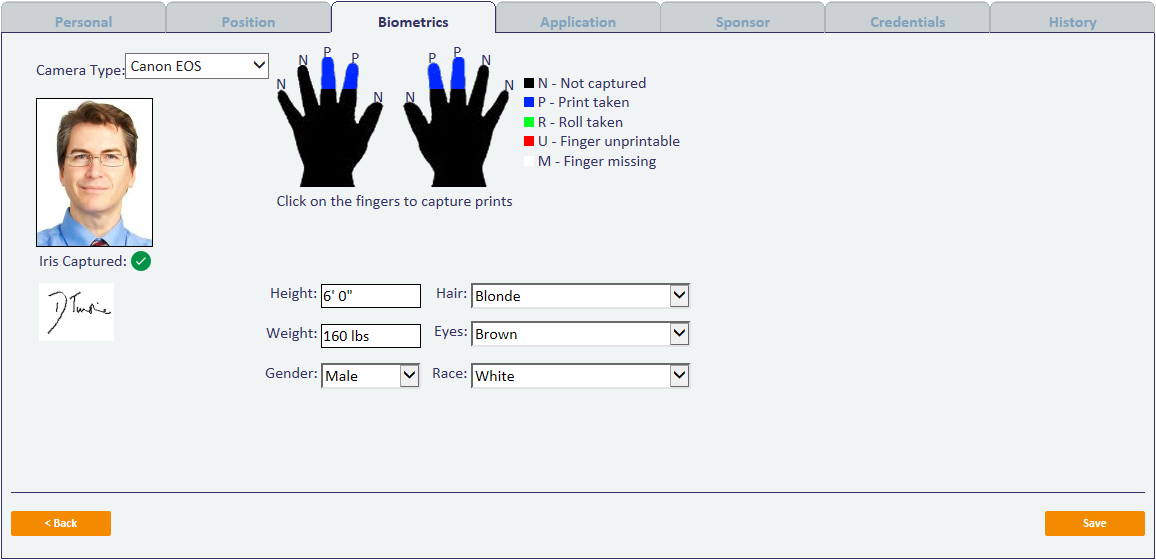
Click the Biometrics tab.

-
To use Aware PreFace to capture the user's facial biometrics, select the Camera Type from the drop-down list then click the user image.
Note: If you want to use Aware PreFace, contact customer support, quoting reference SUP-228.
-
The Iris Captured option provides a read-only indication of whether iris data has been imported for the user.
-
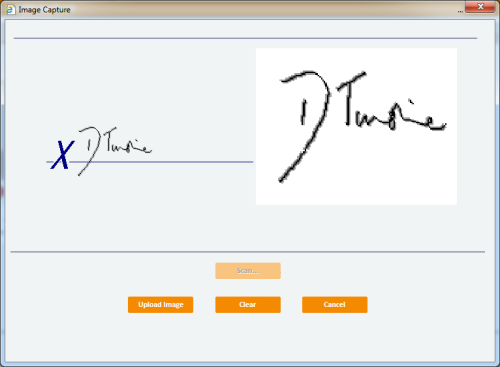
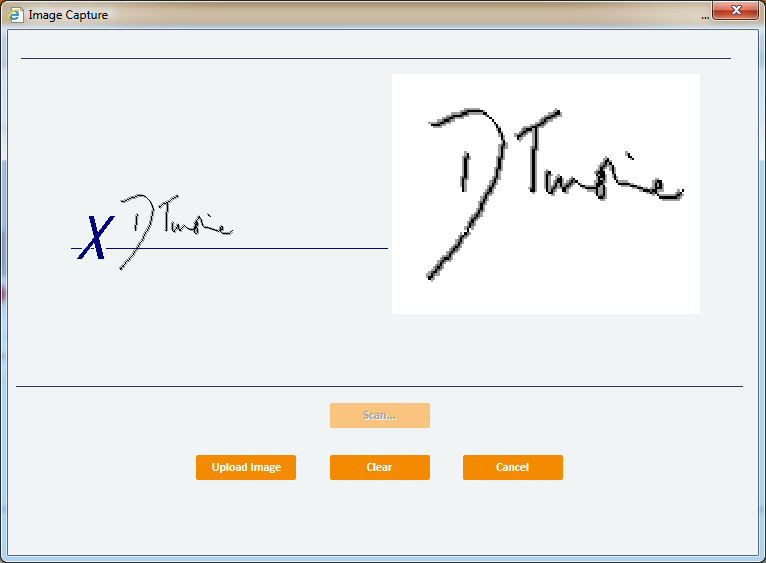
To capture a signature using a signature pad, click the signature placeholder and use the Image Capture dialog to upload a signature.
-
To capture fingerprints, click the finger image.
See your biometric integration guide for details of setting up and using fingerprint biometrics.
When you click the finger image, the workflow prompts you to capture fingers until the configured number of fingerprints have been captured. You can choose to skip fingers once this process has begun.
The preferred order of taking fingerprints, taking into account fingers that are most suitable for the majority of users, is:
- Right index
- Left index
- Right middle
- Left middle
- Right thumb
- Left thumb
- Right ring
- Left ring
- Right little
- Left little
You are recommended to start with the right index finger and proceed with the capture as directed. The capture stops once it has captured (or skipped) the "Left little" finger and the minimum number of fingers have been captured.
You can skip fingers that cannot be captured (due to injury or other special circumstances).
-
Record the applicant's Height in feet and inches. You can enter the two sets of digits separated by a space and the units will automatically be applied.
For example, if the applicant is 5 feet 10 inches tall, you can enter 5 10. This will be correctly displayed as 5'10".
-
Enter the applicant's Weight in pounds. For example, if the applicant weighs 154 pounds, enter 154.
-
Select the applicant's Gender from the list.
-
Select the color of the applicant's Hair and Eyes from the list of options.
-
Select the applicant's Race from the list.
-
-
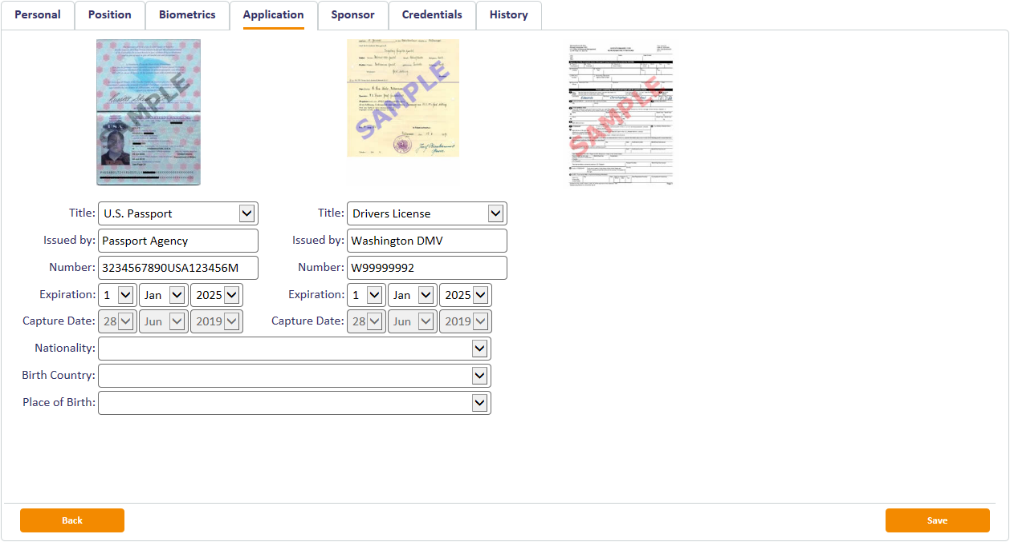
Click the Application tab.
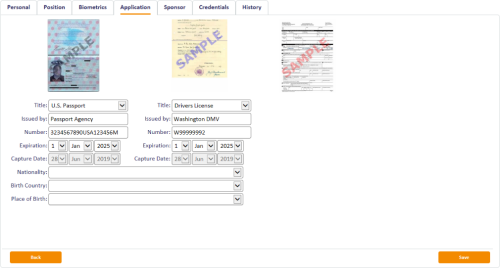
You can provide scans of two identity documents and an SF85 or OPM form.
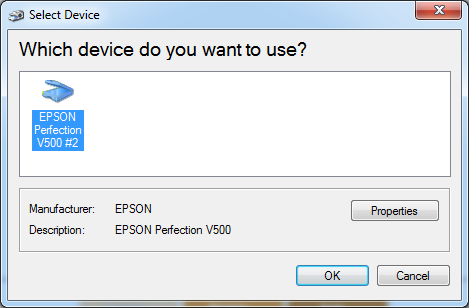
To scan a document, click the image placeholder, then select the scanner you want to use in the Select Device dialog.

Complete the additional data for the identity documents:
-
Title – select the document type. Only documents of the types listed are acceptable as proof of identity.
-
Issued by – enter details of the organization that issued the document.
-
Number – the document's serial number.
-
Expiration – the expiration date of the document.
-
The Capture Date is populated automatically.
Note: The Capture Date is populated only when you use the Edit PIV Applicant workflow to capture the identity documents – if you import the documents using the Lifecycle API, this date is not captured.
-
Select the Nationality, Birth Country, and Place of Birth of the applicant.
-
-
Click the Sponsor tab.
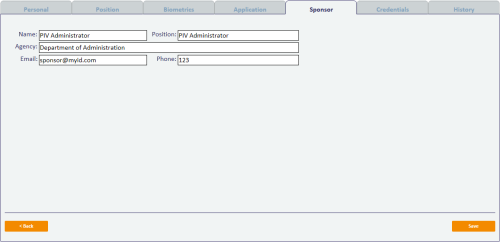
This tab records details of the applicant's sponsor. These details are visible in View Person and during card issuance approval.
- The Credentials and History tab allow you to view the same details as the Edit Person and View Person workflows. You cannot change any details.
- Click Save.


5.15.2 Adding PIV applicants from a directory
You can use the Edit PIV Applicant workflow to add a new user from a connected LDAP.
Note: If you have the Edit Directory Information configuration option (on the LDAP page of the Operation Settings workflow) set to No, you will be unable to edit any of the person data that is mapped to the directory. The default is Yes.
The user must belong to an LDAP group that is mapped to an existing MyID group, and the Search a Directory option (on the LDAP page of the Operation Settings workflow) must be set to Yes or Ask.
If you use the Find Person stage of the Edit PIV Applicant workflow to select a user who is not already in the MyID database, the user is imported, given the Cardholder and PIV Applicant roles, and assigned to the group that matches their LDAP group. You can then edit the user's details as normal.
To add PIV applicants from a directory, you must set up the groups in MyID before you begin:
-
Both the LDAP group the PIV applicant belongs to, and the parent LDAP group, must have been imported from LDAP into MyID. The hierarchy between the group the user belongs to and the parent group must be the same in both MyID and the LDAP. There are various ways to achieve this:
-
In the Edit Groups workflow, select Import LDAP Branch/OU and children to import a group above the group the user belongs to.
This will ensure that the hierarchy of the group and parent group is consistent in both MyID and LDAP.
-
Alternatively, you can create the parent group first, then import the group the user belongs to as a child of the parent group.
-
If this hierarchy of group and parent group is not set up correctly, you will see the following error when trying to import users from LDAP in the Edit PIV Applicant workflow:
Target is not associated with a MyID group
-
-
Additionally, you must ensure that the PIV attributes have been configured for the group that the MyID user belongs to; you can do this using the Amend Group workflow.
-
The logged on user must have the PIV Applicant Editor role and access to the Edit PIV Applicant workflow to import users from LDAP using the Edit PIV Applicant workflow.